Tree Only
Fabric Selection & Cutting Instructions
Here are the colors we will be working with today:
| Swatch | Cutting Instructions |
 |
- Cut 2 strips @ 3.0" x WOF then cut it into strips as follows:
- 2 - 6.75"
- 2 - 5.75"
- 2 - 4.75"
- 2 - 3.75"
- 2 - 2.75"
Cut 2 strips @ 4.0" x WOF then cut it into strips as follows:
|
 |
Cut 2 strips @ 3" x WOF then cut it into strips as follows:
- 1 - 6"
- 1 - 8"
- 1 - 10"
- 1 - 12"
- 1 - 14"
Cut 2 strips @ 1.5" then cut into strips as follows:
2 @ 1.5" x 19.5" and 2 @ 1.5" x 20.5" (for inner borders)
*wait to cut these strips until you measure your completed tree block |
 |
1 square @ 3" x 4.0" |
 | 2 @ 3.5" x 20.5" and 2 @ 3.5" x 26.5" (for outer borders)
*wait to cut these strips until you measure your completed tree block |
 | 3 @ 3" x WOF (assemble into a 90" long binding strip) |
Block Assembly
Each of the rows of the tree will be assembled in the following manner:
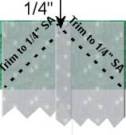
Take 6" strip of green fabric, and attach the two 6.75" WOW strips to each corner as you would to create the mitered joint of a border/binding. That is, sew a diagonal line from one corner of the wow to the opposite side where it meets the corner of the green fabric. See the diagram below:

Trim the seam allowances for each side to 1/4". Press the WOW strips back onto the green strip. Your strip should now look like this:

Repeat the steps above to create the remaining 4 rows of the tree section:
- Sew the 2 - 5.75" WOW strips to the 8" green strip
- Sew the 2 - 4.75" WOW strips to the 10" green strip
- Sew the 2 - 3.75" WOW strips to the 12" green strip
- Sew the 2 - 2.75" WOW strips to the 14" green strip
Sew the 7.75" x 4" WOW strips to either side of the 3.0" x 4.0" brown fabric. Then sew this to the bottom of the tree section.
Sew the remaining 4.0" x 18.5" WOW strips to the top and bottom of the tree section.
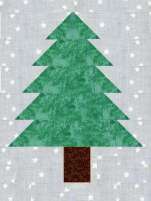
Your Finished Block:

Add Borders
Measuring through the middle, find the width of the top. If your 1/4" seams are accurate, it should be 18.5". Repeat to find the length of the top. This should be 19.5". Add the inner green 1.5" borders, first to each side, then to the top and bottom. Repeat to add the 3.5" holiday fabric outer border.
Quilting and Embellisment
Quilt and embellish the tree top as desired. Consider using gold cording for the garland and small decorative buttons for the ornaments. Don't forget to add some christmas packages and an angel or star on top!
Finishing Touches
Add the binding using the double french fold technique. Hand or top stitch the binding to the back. Be sure to use a scrap piece of muslin, 6" x 24" (2" less narrow than the finished width) to attach a hanging sleeve. You may also prefer to make hanging tabs and hang the wallhanging from a decorative pole.
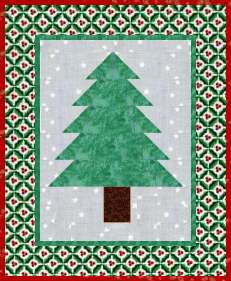
Your Finished Wallhanging
